The biggest problem we have faced as product developers and as traders with TradesViz is: importing trades. We support over 100 brokers/platforms for manual import but let's be honest. This is 2020++ and we need to automate these mundane processes.
Now we are very close to solving that problem with this new feature!
You can now automatically import your trades from selected brokers into your TradesViz account safely and accurately with just a click of a button. No need to follow instructions to download csv files, no need to fiddle with options, no need to drag and drop files - just 1 click and you will have all your imported to your TradesViz account. How to do this? let's explore!
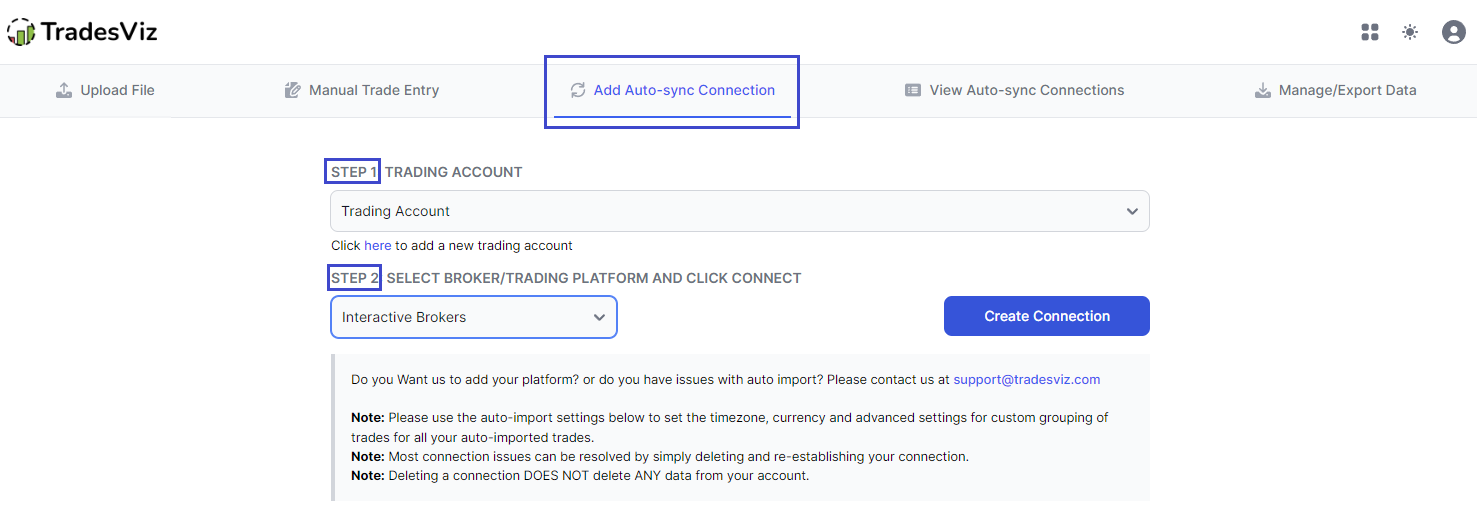
When you now visit the tradesviz.com/import page, you will see an additional option called "Add auto-sync connection" at the top. Click on it and you will have options to set up an auto account syncing/pairing with various brokers. You can visit the import page by clicking on the profile icon at the top right corner or by clicking on the upload icon at the bottom left corner of your main dashboard.
To link a broker/platform to your TradesViz account, follow the steps below:
- Select the trading account into which you want the trades to be imported automatically
- Select the broker/platform in the next dropdown
- Finally, click on the "Connect account" button

This will open a popup box with content that varies according to your selected broker. Note that each broker has a unique way of pairing with your TradesViz account.
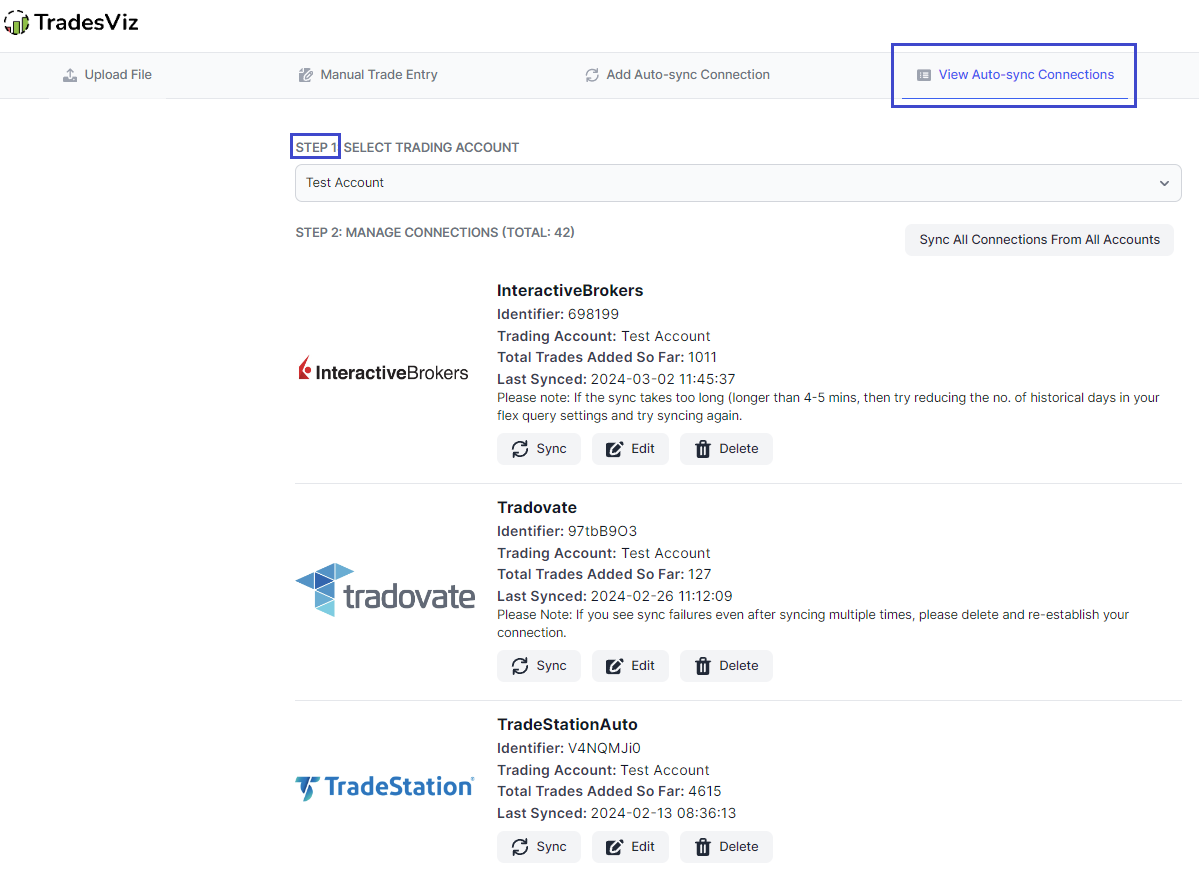
Once you successfully connect your account, you will see the list of connections in the Account connections list after selecting your trading account.

For each connection, you have options to manually trigger a sync, edit the connection attributes (like the name of the connection or the data from which you want to sync (for specific brokers), and delete the connection (deleting the connection does not delete any data synced so far).
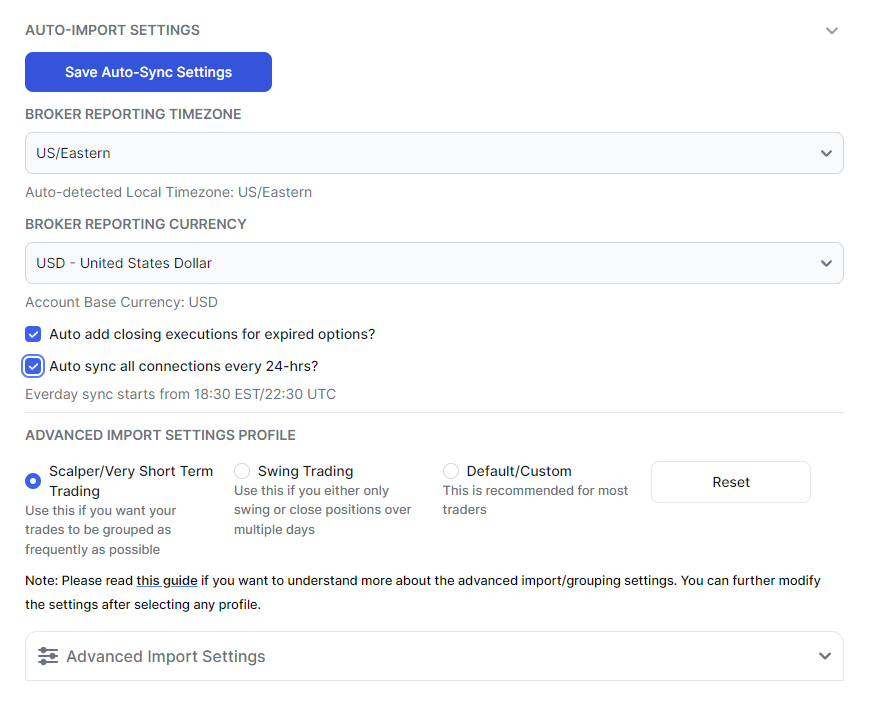
By default, all connections are synced every 24 hours (make sure "sync every 24 hrs" is turned on in the auto-import settings section in the "Add auto-sync connections" tab and save the settings). You can also manually click on "sync" anytime you want - you don't even need to worry about duplicates because they are all taken care of in our databases.
Finally, there are import settings that you can apply for all the connections - just like in the manual import page. Head over to the "Add auto sync connection" tab and scroll down to the auto-import settings.

Here you can set how you want your trades to be grouped (note that the profile section will not show the selected profile once saved and the page is refreshed - however, the profile affects this settings under the advanced import settings section and that will be saved to your profile). This affects ALL trades imported from ALL connections. Don't forget to click on "Save auto import settings" after doing the changes.
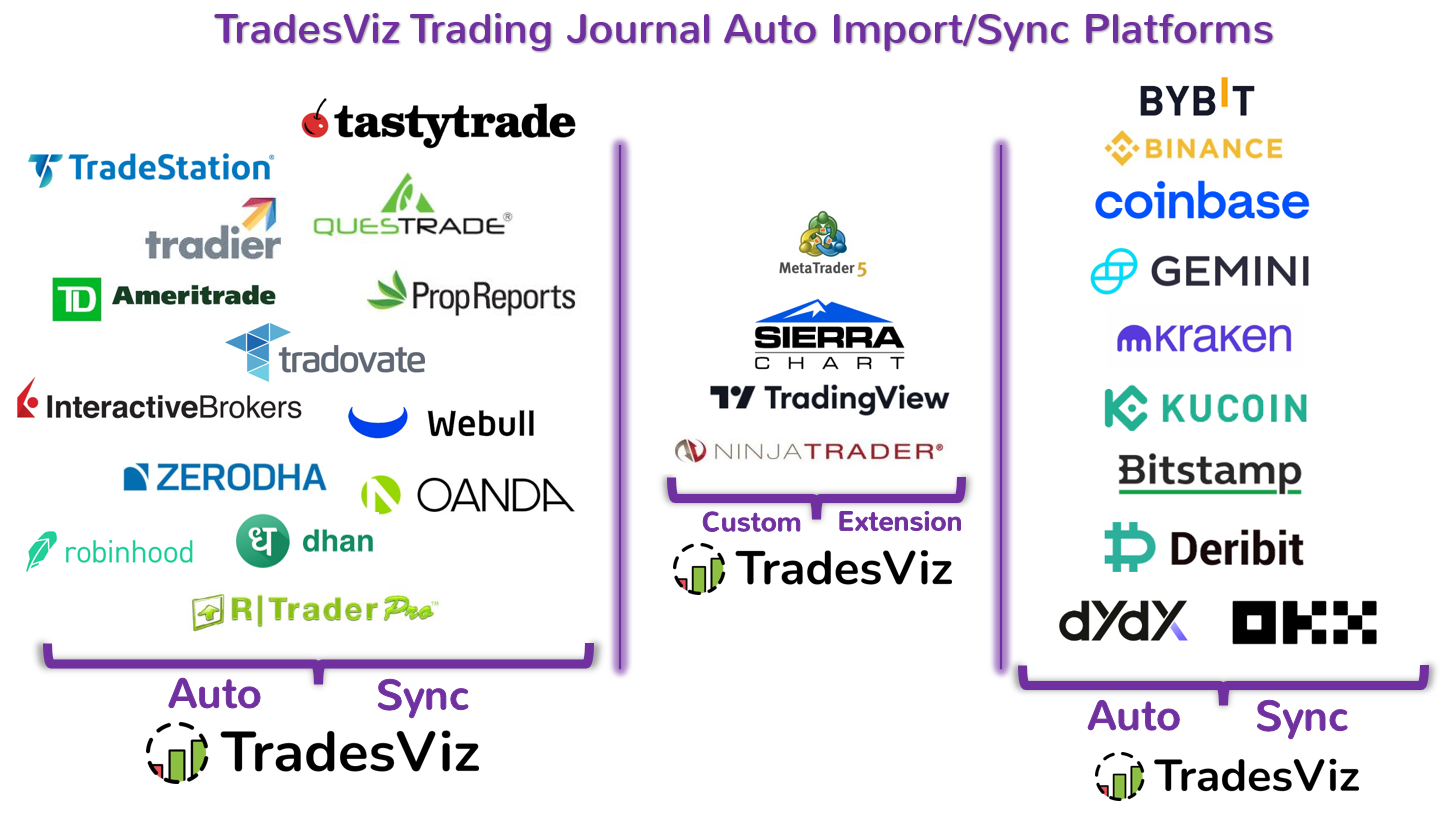
So far, we have auto-integration support for the following platforms:
- Interactive Brokers (Sync/account connection instructions)
- TD-Ameritrade (Sync/account connection instructions)
- Tradestation (Sync/account connection instructions)
- PropReports (Sync/account connection instructions)
- Robinhood (Sync/account connection instructions)
- Tradier (Sync/account connection instructions)
- Oanda (Sync/account connection instructions)
- Binance/Binance US (Sync/account connection instructions)
- Google Drive (ANY broker/platform) (Sync/account connection instructions)
- Bybit (Sync/account connection instructions)
- NinjaTrader (Real-time auto-sync instructions)
- Kraken (Sync/account connection instructions)
- Bitstamp (Sync/account connection instructions)
- KuCoin (Sync/account connection instructions)
- Bitget (Sync/account connection instructions)
- Gemini (Sync/account connection instructions)
- FTX (Sync/account connection instructions)
- SierraChart (Real-time auto-sync instructions)
- Webull (Sync/account connection instructions)
- Zerodha (India) (Sync/account connection instructions)
- Coinbase (Sync/account connection instructions)
- Questrade (Sync/account connection instructions)
- Dhan (India) (Sync/account connection instructions)
- Tradovate (Sync/account connection instructions)
- Rithmic (Sync/account connection instructions)
- Angel One/Angel Broking (India) (Sync/account connection instructions)
- TradingView & all platforms that are tradable via TradingView (Sync/account connection instructions)
- Alpaca (Sync/account connection instructions)
- Deribit (Sync/account connection instructions)
- Fyers (India) (Sync/account connection instructions)
- OKX (Sync/account connection instructions)
- MetaTrader (Real-time auto-sync instructions)
- dYdX (Sync/account connection instructions)
- TastyWorks/TastyTrade (Sync/account connection instructions)
- cTrader (Sync/account connection instructions)
- MetaTrader 4 (FTP) (Sync/account connection instructions)
- Metatrader 5 (FTP) (Sync/account connection instructions)
- Metatrader 5 (non-FTP - 100% auto - All brokers) (Sync/account connection instructions)
- Charles Schwab (Sync/account connection instructions)
- MEXC (Sync/account connection instructions)
- Phemex (Sync/account connection instructions)
- Coinex (Sync/account connection instructions)
- BingX (Sync/account connection instructions)
- Ironbeam (Sync/account connection instructions)
- TradeLocker (Sync/account connection instructions)
- Trading212 (Sync/account connection instructions)
- WOOX (Sync/account connection instructions)
- HTX (Huobi) (Sync/account connection instructions)
- Bitunix (Sync/account connection instructions)
- Hyperliquid (Sync/account connection instructions)
We are constantly trying to add more brokers/platforms to our auto-import list. If you would like to help us by being a beta tester for the platform/broker you use, please contact us at [email protected] - this will only accelerate the progress and together we can help many traders all over the world have an effortless journaling experience! We would very much appreciate your efforts and help if you could volunteer to be a beta tester for our new feature!
Note that regarding security features - we will explain what data is exposed to us and what we have access to in our following blog posts which have instructions on how to pair your account with every currently supported broker. The gist is that - we NEVER have edit/execution capabilities to your account. All brokerages/platforms are very stringent about this so all we have is very limited read-only data from your account.
If you have any concerns or questions about this feature, please don't hesitate to contact us at [email protected]!
Last updated: Apr 3rd, 2025
